Using Microsoft Power Automate to Connect Forms, Planner and Teams
As a Marketer, I’m used to using a variety of tools and apps in my day to day work. Some even brag about the depth of their MarTech stack, but I’ll be honest it’s getting a little old. I’ll give a tangible example.
At Worksighted, I’ve built a form that my coworkers are prompted to fill out whenever they have a Marketing Request. Previously, I built it in a third-party survey tool and then set the alert email to be the Teams channel email so our whole team would get notified when a new request was put in. I would then create a task in another third-party to-do app that only the marketing team used and would paste in relevant details. Finally, I would go to Microsoft Teams to find the right channel to alert other team members about the request. This required 3-4 different apps to track one simple project, each app with a different login, a different screen, and I knew there must be a better way.
Then I learned about Microsoft Power Automate.
Power Automate is basically is an app connector that works especially well inside of Microsoft 365. You can automate simple tasks to save time and help keep your team on the same page. For example, post in Teams when a Planner task is completed or a bit more complex like adding a contact to your email list when they @mention you on Twitter.
I’ve dabbled with some automation tools in the past like Zapier and IFTTT so the concept wasn’t foreign to me. I couldn’t quite get it right, until we hired Michael Rolen. Michael is new on our team is a Power Apps developer, I contacted him on his second day in the office 🙂
We worked together to create a flow that started in Microsoft Forms, a similar form designed to gather details about a coworkers request. Then, the info would flow through Sharepoint Lists, to a Planner Task, an email to the submitter and to me, and a post in Teams. All, automatically. Genius!
Here are a few tips I learned along the way:
- Power Automate has a collection of prebuilt templates that make a great starting point when you are just dipping your toes in the water. These are so easy to use and can get up and running in less than 10 minutes (dare I say, even 5).
- All info should flow through SharePoint Lists. I’ll be honest, I don’t quite understand this one yet, but I’ll show you below why it mattered to me. SharePoint Lists is the database power engine behind most of Microsoft 365. Once info is mapped in a List, you can easily pull that data to other apps.
- Don’t be afraid! If automation tools are new to you, this might all seem foreign and that we shouldn’t touch it unless we have 20 years of IT experience on our resume. That version of IT, where only one person is knowledgeable enough to interact with it, is on it’s way out. Microsoft and many other software programs are unleashing powerful components of IT and putting it right into the hands of everyday people, like me (and maybe you!). Although it might feel new, you will be surprised at just how easy they have made it.
Here’s What I Did:
The Setup – Create a Form, List and Planner Tab
1. Create a form in Microsoft Forms with the information you are wanting to collect
2. Fill out the form as a test
3. Go to the responses tab and click “export to excel”
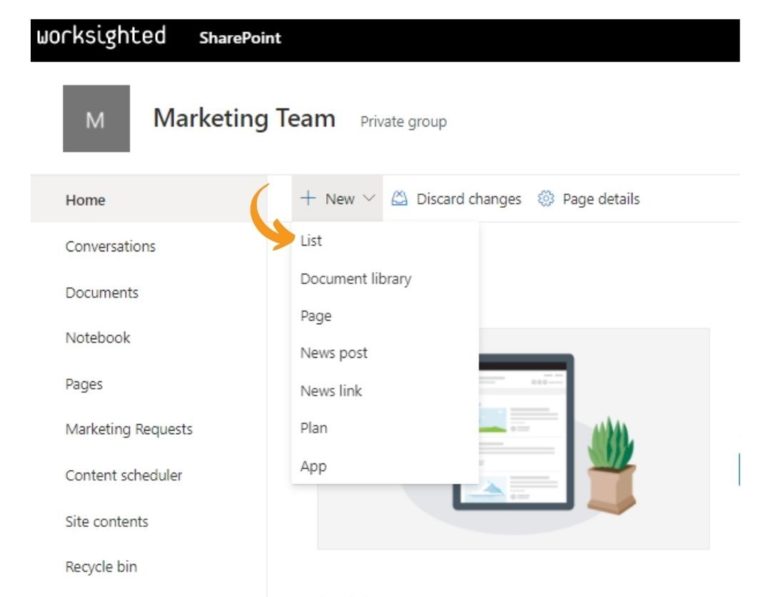
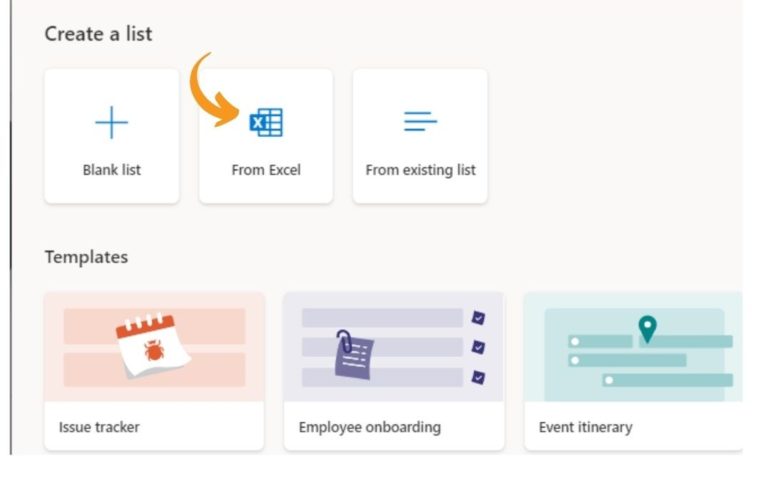
4. Head over to SharePoint and create a new list from excel and upload the list you exported from Forms
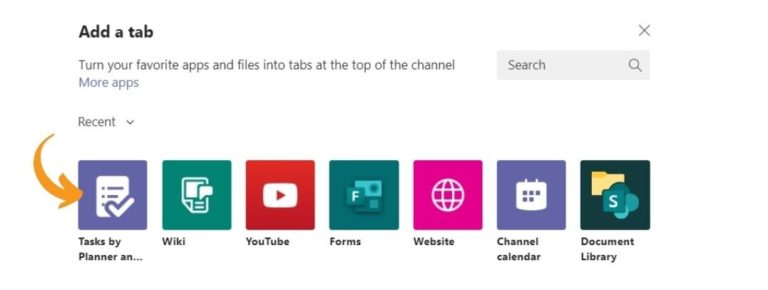
5. If you don’t already have one, create a Planner tab in one of your channels in Teams
The Fun Stuff- Creating Your First Flow
1. Head over to Microsoft Power Automate
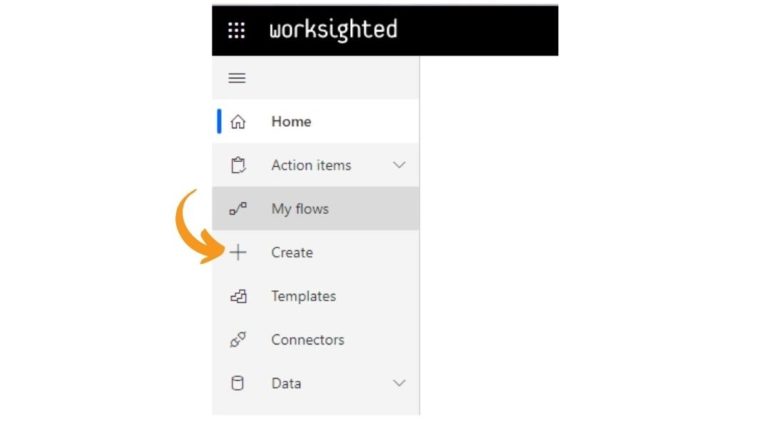
2. Click Create in the left hand menu
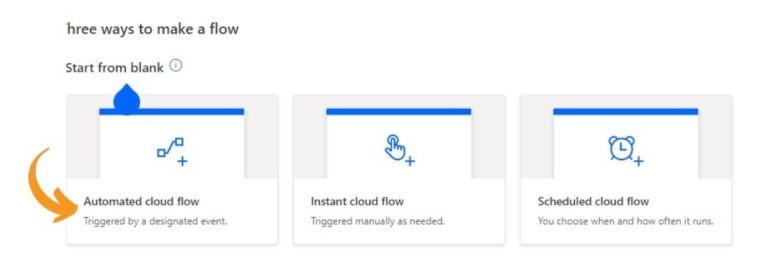
3. Choose Automated cloud flow
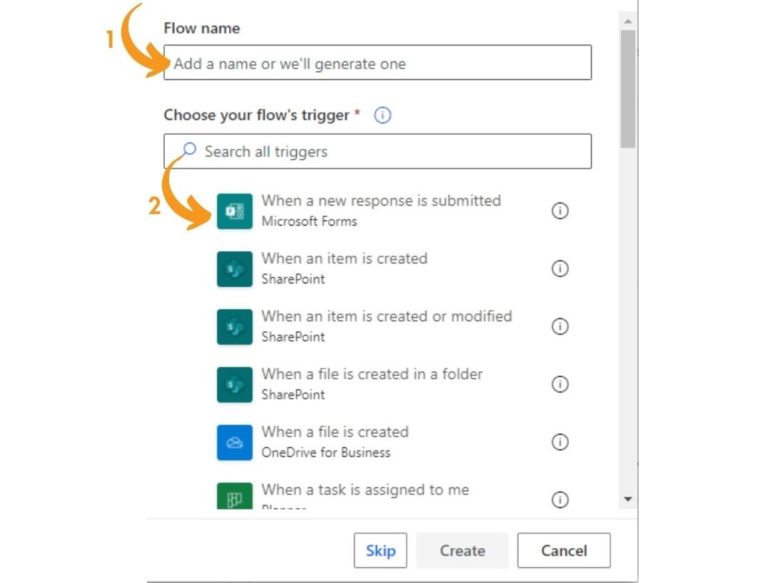
4. Name your flow and choose your flow’s trigger “When a new response is submitted” in Microsoft Forms
5. Select your form from the drop down menu

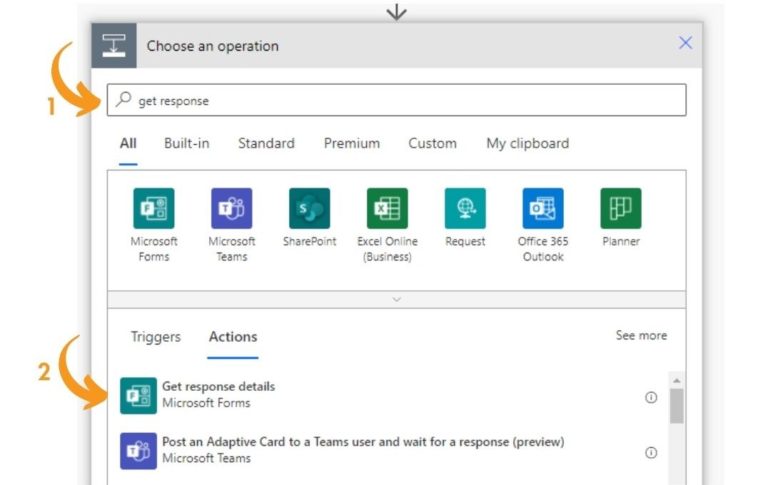
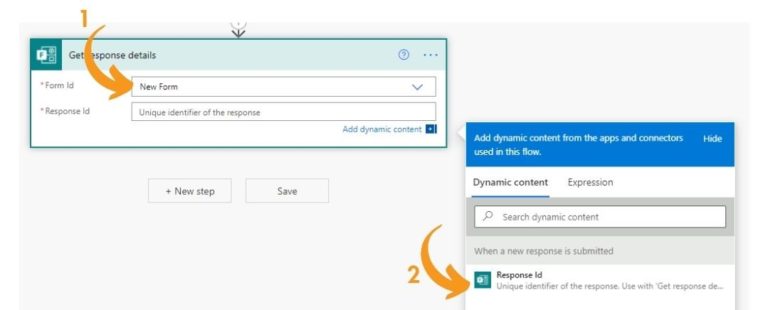
6. Click “New Step” and search for “get response details” and select it. Choose the same form as above and in the Response ID section, choose “Response ID” under dynamic content
7. Click New Step and then search for “Create Item” and choose the list you created earlier from the drop downs
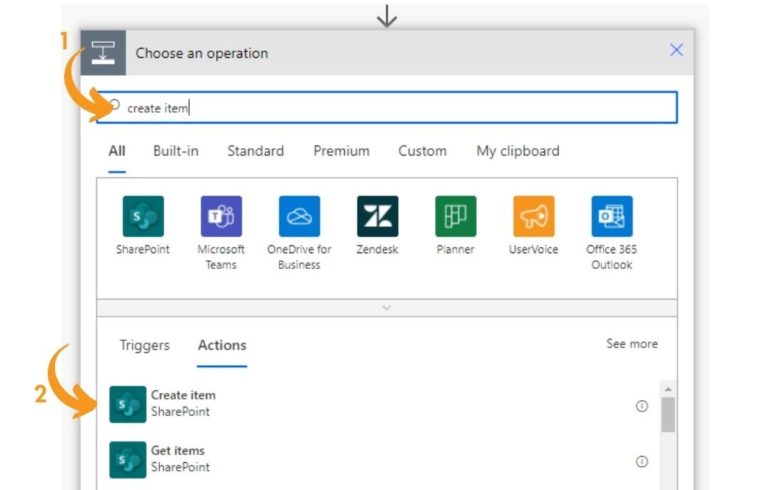
8. Select the SharePoint Site and List from the dropdown menu. Once selected the fields from the list should appear.
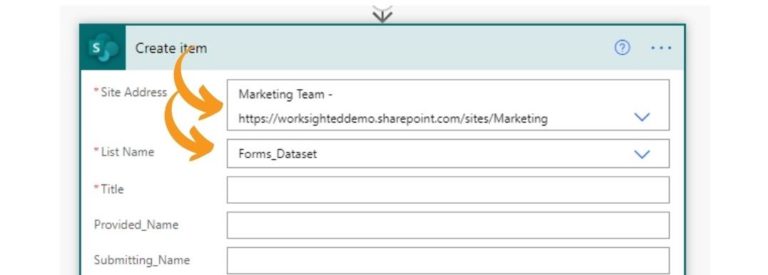
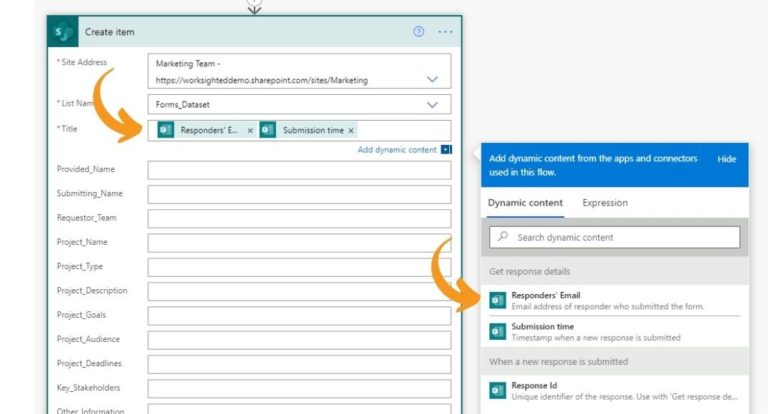
9. Map the fields of your SharePoint list, to the Forms data using the Dynamic Fields. The Title should be a unique identifier for each item. For this try doing “Form Submission” then selecting the responder’s email and submission time as dynamic content.
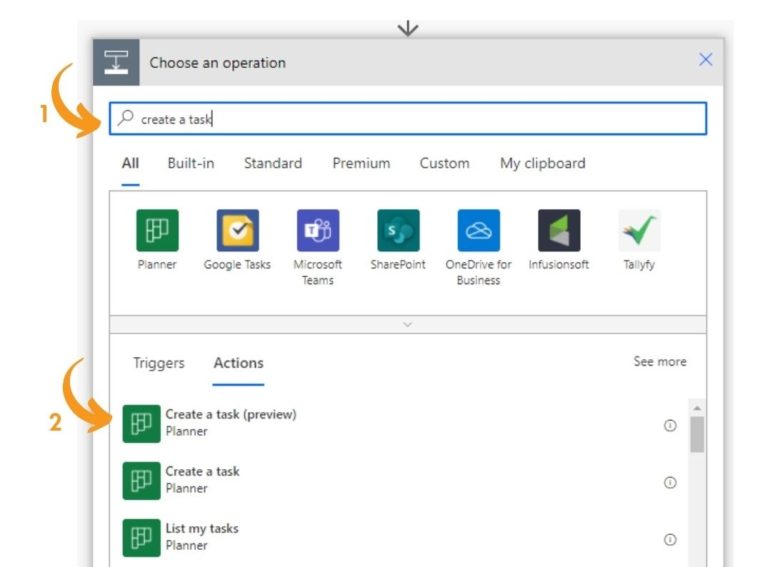
10. Click New Step, search for “Create a Task” and select it.
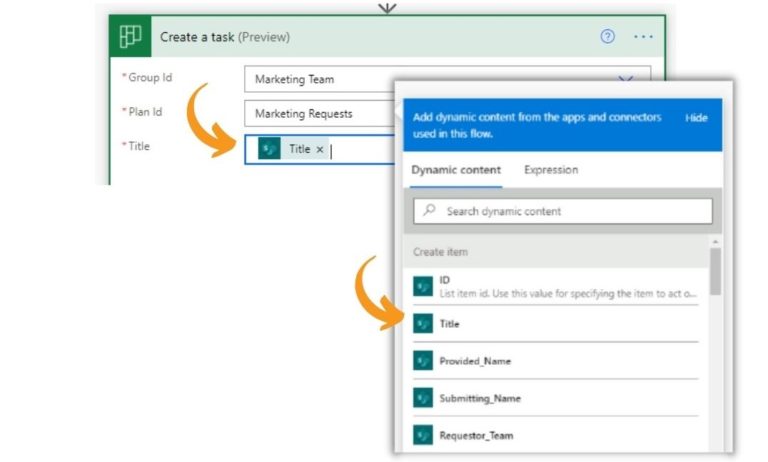
11. Select the correct group and plan and map the Title to the Sharepoint List field “Title”
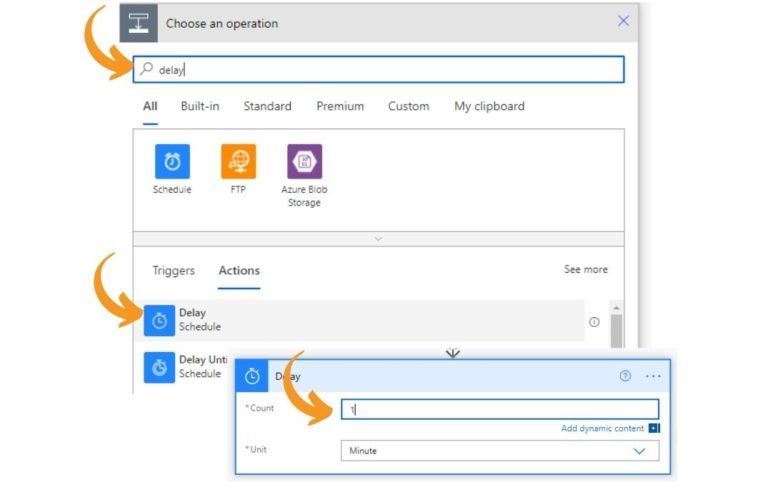
12. Click New Step and search for “delay” and enter in 1 for count and Minute for unit
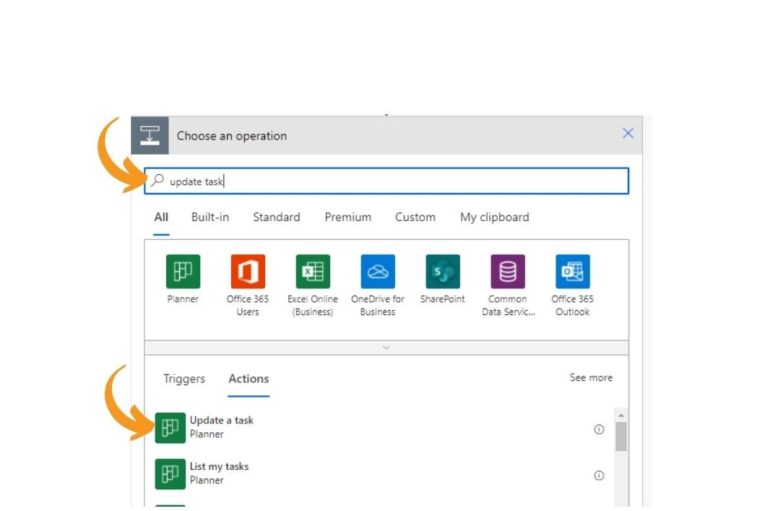
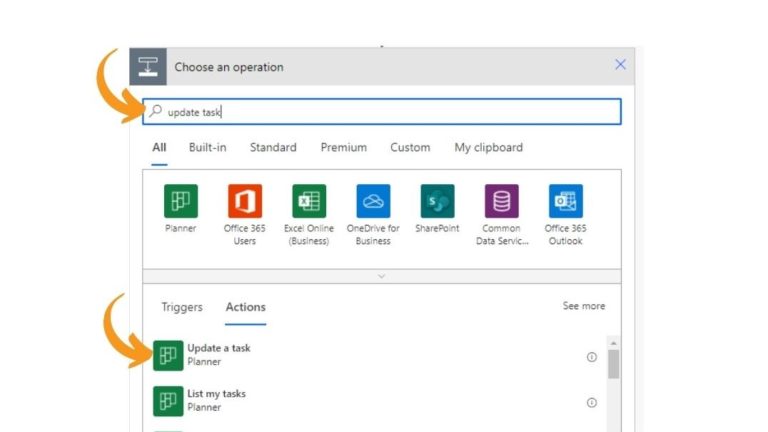
13. Click New step and search for “update task” and select “Update task details”
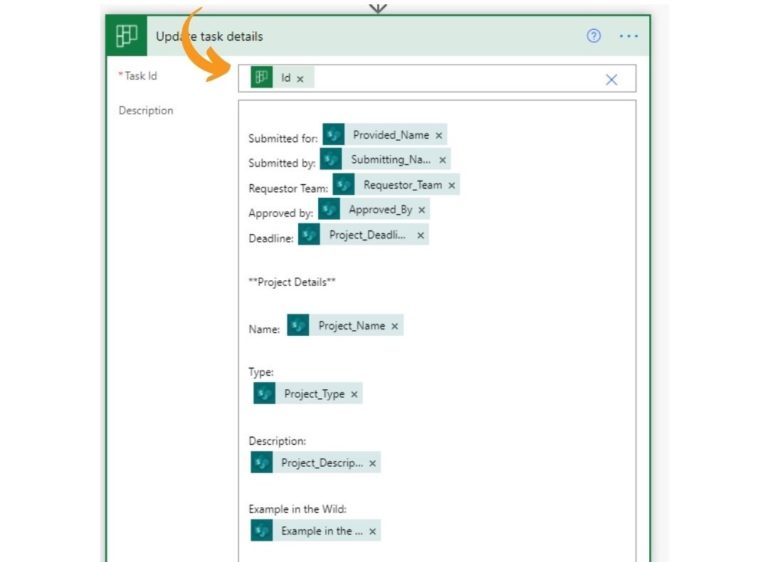
14. In the Task ID section, search for the “ID” field
15. Under description, find the fields you would like to show on your Planner task, feel free to add in formatting that might make it easier to read. Make sure to use the fields from the Sharepoint List (not directly from the form). You can tell it comes from Sharepoint because it will have the teal logo.
16. And, that’s a wrap for creating a Planner card from a Forms submission. Two more things I added to mine were an email notification and a Teams posts to notify my teammates.

17. Press save!
Test and Iterate
1. Once saved, it’s time to Test. Click test in the upper right hand corner
2. If there are already responses in your form you can select “automatically” and it will grab the latest submission. If not, select manually and go to your form to fill out a test submission
3. Hopefully, it goes through without any errors. But if not, it will let you know what is broken and suggest tips to fix it.
4. That’s it! Start using it and you can come back anytime to make this work even better.
We’ve loved using this flow, it helps keep our team on track, informed and kicks off our project management process in Planner. I encourage you to try out a flow of your own and unleash the power of the Microsoft 365 platform. If you are ready to make the switch to Microsoft 365, get in touch today!
